However, when I saw this breadbox at a thrift store, my first thought was, "This would make a perfect roll top desk for 18" dolls. I'll make it and then give it away."
I knew that the biggest challenge would be creating stable legs, So I began by building a small, sturdy shelf to serve as the back support as well as provide storage for books and school supplies. (I probably wouldn't have thought of that, but I have a small, vintage roll top desk that is constructed this way.) I used the height of the doll's kitchen table, which was 10" from the floor to the bottom of the table, as my guide for the height of the shelf and front legs. The width of the shelves was slightly less than the width of the bottom of the bread box. Using an inexpensive 1 x 3, I constructed this simple shelf and attached it to the bottom back of the bread box with wood glue and screws:
While I was at Lowes picking up the 1 x 3, I noticed some bannister posts on clearance for 54 cents and bought two of them for the front legs:
They were, of course, way too long, so I cut them to 10" and will save the rest for another project. Because the posts are a bit spindly, I knew they would need extra reinforcement to keep them from breaking off the desk, so I added a bracket to the back of each post:
I marked the spot for each post at both front corners of the desk (I just chose a spot that I thought would look good and made sure it was the same on both sides) drilled a hole, applied wood glue to the desk and the post, and then secured the post to the desk with a 2" screw. I had pre-drilled a pilot hole through the center of each post. I then drilled up from the bottom through the bracket hole and added a shorter screw so that it wouldn't pop up through the desk top. I filled all my screw holes with wood filler and then sanded them flush. The back shelf also needed some sanding.
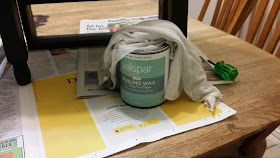
To reinforce the "old time" feel of the piece, I decided to paint the desk with chalk paint (not to be confused with chalk board paint.) I went with black because I already had a dark chair that was a perfect accessory. (My granddaughter thinks black is a disappointing choice, so you may want to choose something cheerier.) Knowing that it wouldn't take much, I used a coupon and bought a small pot of chalk paint at Hobby Lobby. It did take three coats to cover the large word "bread" emblazoned on the front, but I still had enough. After the paint dried, I applied a thin coat of wax that I bought at Lowes:
Ready for school. . . .
(I wish I had taken a picture of the desk with the top open, but it's too late
--I have already given it away.)


This is so cute, Marilyn. I want one.
ReplyDelete